Classic Granny Square: Structure, Corners & Rounds
Understand the structure of a classic granny square, including double-crochet clusters, chain spaces, corners, round joins, and color changes.
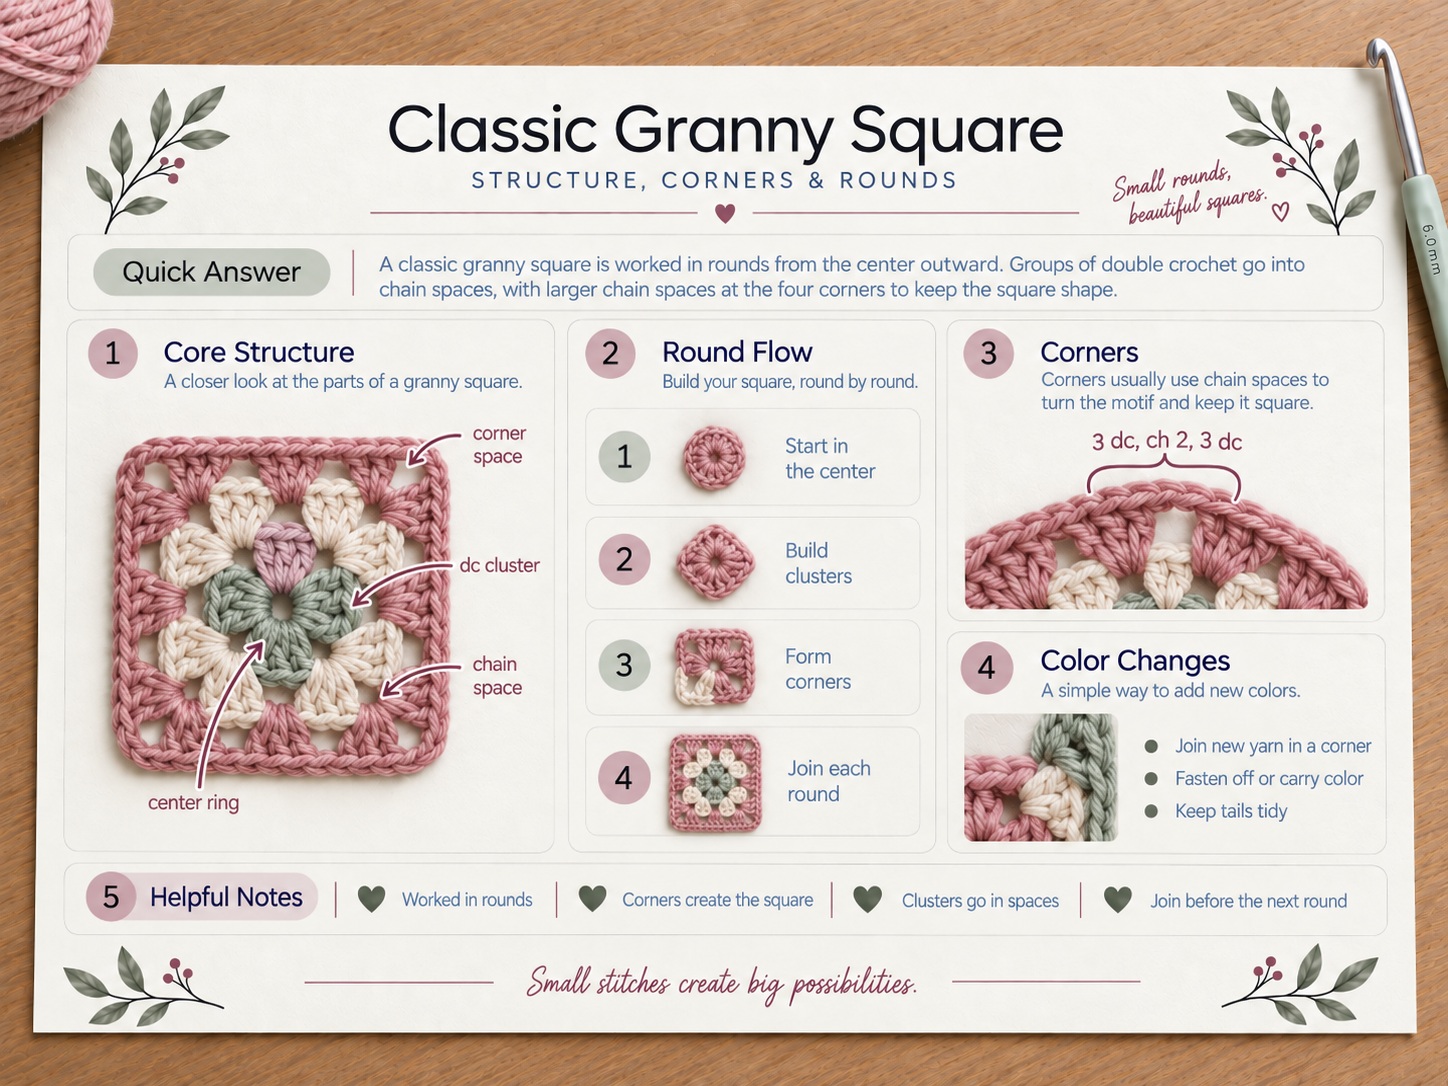
A classic granny square is built in rounds from the center outward. Groups of double crochet are worked into chain spaces, with larger chain spaces at four corners to keep the motif square.
Mini lesson sheet
Keep the short row instructions on one side and the visual target on the other.
- Use this as a quick check before the full lesson.
- Keep it nearby while you practice the stitch or technique.
Finished result

Key facts
How to do it
 01Step 1
Start with a magic ring or a short chain joined into a ring.
 02Step 2
Build the first round with four double-crochet groups separated by corner chain spaces.
 03Step 3
Close or continue the round according to the pattern’s joining method.
 04Step 4
For each new round, work stitch groups into the spaces between groups from the previous round.
 05Step 5
At each corner, work the required group, corner chains, and second group into the same corner space.
 06Step 6
Check that four corners remain distinct and the square lies reasonably flat before adding more rounds.
Video walkthrough from Bella Coco
Use this as a second explanation after the written steps. Pause, replay, and compare the motion with the close-up images above.
Make it easier
- Mark the first corner if repeated joins make it difficult to see where each round begins.
- If the square cups, review corner spacing and tension before continuing many more rounds.
What usually goes wrong
- Missing a corner space
- Adding extra groups into side spaces
- Pulling joining slip stitches too tight
Questions about classic granny square: structure, corners & rounds
Why is my granny square twisting?+
A small amount of twist can come from stitch direction and tension. Turning between rounds can reduce directional bias in some patterns, while consistent corner spacing also helps.
Build the next connected skill.

Double Crochet Stitch (dc) Tutorial
Master US double crochet, including the yarn-over sequence, turning height, stitch counting, and tips for consistent tall stitches.
Open guide
Single Crochet Stitch (sc): Step-by-Step
A clear single crochet tutorial covering insertion, yarn overs, turning chains, stitch counting, and how to avoid shrinking rows.
Open guide
Half Double Crochet (hdc) Tutorial
Learn half double crochet with the correct yarn-over sequence, stitch anatomy, turning guidance, and fixes for uneven rows.
Open guide
How to Crochet a Chain Stitch (ch)
Learn the crochet chain stitch, how to hold the hook and yarn, where to count chains, and how to keep the foundation edge even.
Open guide